Monday, January 09, 2012

A new tunnel and parts back from the welders

Work has been a bit slow on this car in the recent months due to other commitments, but I have been able to chip away at a few jobs. One thing I was not looking forward to was making another gearbox tunnel as it takes a lot of fitting and re-fitting to make sure the fit is right, which involves a fair bit of time on my knees.
Just to complicate things, I wanted to make the new tunnel look more like the factory version, which means I should be able to fit the radio/dash support.

I started off by fabricating the rear-most section first, which needed relatively small diameters and a quick step up between them to give space for your hand to use the handbrake.
Than I moved forward to cut the piece which will hold the tunnel onto the bulkhead and welded a section onto this, along the inner profile and then carried on fabricating back along the passenger side.


And here it is in place for yet another trial fit.


With all the welding on the gearbox tunnel I set to painting it, here you can see the back piece is separate to allow removal of the tunnel without having to disconnect the hand brake.


This was finished over the course of a number of weekends, finally being painted and the inside covered with my perfered sound deadening and heat reflective material.


Eleswhere on the car, the surge pot has returned from the welders with the bosses I turned-up to allow me to use banjo bolts in the end of the pot, instead of the JB welded in 90degree fittings. The banjo bolts should be a lot easier to work with and seal better also.


Also coming back from the welders was the airbox, which I had cut the previous 50mm inlets off from and had them tack on one of the new 75mm inlets. It's only tacked on for now to let me work out where the second inlet, which goes further back, should be positioned.

Thursday, September 15, 2011

Glass, loom and dash in

Between taking the Bank holiday weekend off to play engines at the Cambridge Museum of Technology and preparation for the external audit, I have been able to get a bit more done on the GT6. Both the front and rear screens are now in, making it almost waterproof. In the end I decided to have my (relatively new) clear windscreen moved over from the old body and fitted in the new body, as none of the windscreen fitters I contacted could supply the tinted glass.

The wiring loom was carefully removed from the old body an transferred over with minimal fuss, which meant I could also fit the dash and steering column.
The loom has been altered again slightly to tidy it up and to allow the EDIS unit for the megajolt ignition system to stay within the car, behind the passenger glove box.


Getting brave, I decided to confirm the position of the header tank and coil pack on the bulkhead, drilling into the fresh paint. Extra length fasteners will be used here, so the EDIS unit and megajolt unit can be mounted on a plate underneath. Now I've fixed the position of the coil pack I can measure-up the length of the plug leads and consider getting a set of Magnecore ordered.


I had to move the car out of the workshop for a couple of day, so it gave me a good chance to get a shot of the rear, with the refurbed lights and new number plate. It really does look quite funny to me with the skinny tyres and the rear wheels hiding far within those arches.


In other news, the BMW E21 has passed it's MOT again first time, with only a couple of advisories, which I shall see to in the next week or so.

Friday, August 26, 2011

GT6 rebuild continues

Over the last week I've been able to crack on with the GT6 rebuild fairly well, getting the driveshaft assemblies put back together and fitted on the car, the adjustable rear radius arms serviced and fitted. This means the car could go back down on it's wheels to make it easier to move around.


The rear bumper was removed from the old body, mounting threads cleaned up and re-fitted to the new body and the number plate light serviced.
The number plate light was a case in point of how a simple job can take quite a while if you are trying to do thing right. The hole where the number plate light wires go into the body is smaller in the new body, so I needed to fit a smaller grommet, simple eh? It should be, but someone had put some nasty replacement bullet connects on the light fitting, which did not mate well with the rest of the loom. So I ended up carefully removing the wires from another light fitting to make one good part, which all of course took time.


Armed with a tin of strong adhesive I made a start on the headligning, with the strips of sound deadening going in first, followed by the headligning. There are a few ripples in the fabric, but not much worse than it was before I removed it.


Meanwhile, the bonnet was refitted, along with the door glass, fuel filler, door handles and some smaller fittings.


I'd like to get the windscreen fitted soon, so I can start moving over the dash and wiring loom, but at the moment I'm having a bit of a job trying to find someone to supply and fit a Sundym (green tinted) windscreen. I know they are available as I have seen them listed by three Triumph parts suppliers, but none of the fitters seem able to find one.

Thursday, August 18, 2011

Start of the rebuild

Last week after the paint had cured on the chassis, I made a start re-assembling the GT6. The front suspension has been removed as complete units, so ten bolts later and both sides were back on the chassis, closely followed by the steering rack and differential.
In-between work on the chassis, the main body of the gearbox was swapped out for one I had rebuilt some years ago and fitted with a new old stock AP Borg-Beck clutch and then re-united with the engine before being refitted to the chassis as one unit.


Next up was the body, as before, it was carefully moved into place using trolley jacks, axle stands and lumps of wood until it was in position. Thankfully it all lined-up and all the bulkhead modifications were in the right place, giving the appropriate amount of space all around.


Then last weekend I started fitting some of the smaller parts back on the front end of the car, such as the front quarter valances, bumper, spoiler and inlet manifolds.


When I removed the driveshafts, upright and lower wishbone from the rear of the car I noticed the wishbones seemed a bit tight against the uprights, not letting them rotate very easily, so I wanted to check these over before fitted them back on the car. An hour later and one side was separated, but I had destroyed the bushes and cut the bolt in order to do so. The problem here was that the metal bush had seized onto the long trunnion bolt.
After getting psyched up ready to tackle the other side, it came apart quite easily, just as it should have, though I will replace the bushes for good measure.
It was suggested to me that for awkward parts like this, which have a habit of seizing up, there is something better that the usual Copaslip type anti-seize compounds, which is Chesterton 785. I have ordered a can of this, though I probably won't know for some time now how effective it really is as I don't plan on stripping these parts down again for quite some time.

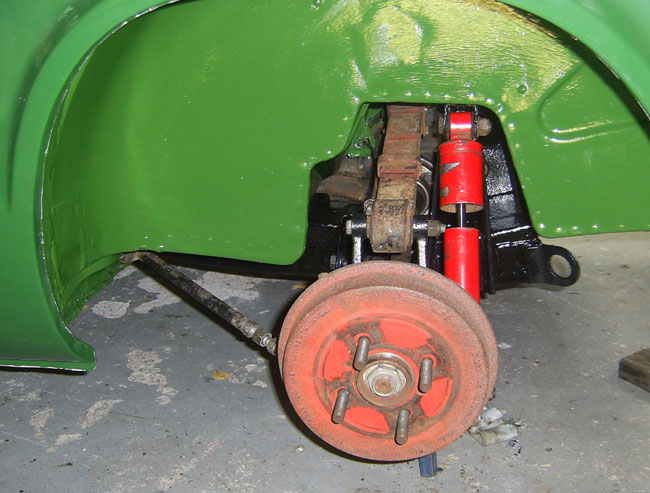
While they were out, the rear uprights, wishbones and brake back plates were all given a couple of coats of Rust Bullet Black shell and the CV joints were cleaned out and re-packed with molybdenum grease for good measure.

Wednesday, August 10, 2011

Chassis time

A couple of weeks ago I made a start on the chassis by chopping off the outriggers, there was plenty of strong metal in them, but they were somewhat home-made looking and they would not have lined-up properly with the replacement body.


Cutting them off revealed the remain of the previous ones and a couple of holes in the chassis to be delt with.


The old and thinned metal was cut out and replaced with fresh 2mm plate, butt welded in. It's a shame I had to grind the welds back so much, but as the outriggers fit over this, it needs to be quite flat.


The replacement outriggers went on quite easily, with only a couple of milimeters needing to be removed from each outriger for them to fit in the right position on the chassis rail. Because I was fitting the outriggers without the body in place, quite some time was taken to make sure they were to be welded in the correct position, mainly by taking lots of measurements from the chassis I had borrowed to move the body to the paint shop.


I'd spent quite a bit of time stripping off the old paint, but I realised I could not get into all of the area to clean it as well as I wanted, so I decided to get it shot blasted. Luckily for me, I'd found someone fairly local, who could do the job while I waited.
With the chassis back, there was a little more welding to be done, the shot basting having revealed some thin metal in the bonnet mounts and the front crossmember. The chassis was then painted using Rust Bullet Black shell for added protection.

Tuesday, July 19, 2011

Start of the strip down

It was the Wye Dean Triumph meet near Coleford last week and on the way back I decided it was time to make a start on the body swap. Work started on Saturday with only as much interiour removed as required, so it can be stored in the body for now, fuel and brake lines disconnected and the inlet manifolds removed to give enough space fot the body to be lifted pass the engine. A set of steel wheels were also fitted to keep the alloy wheels in good condition and make the car easier to roll around.


My method was to lift the body up and roll the chassis from underneath it, complete with the bonnet and running gear. Doing it this way means it is easier to disconnect the running gear as you hae much better access to it.


By the end of Sunday the body was completely free and the chassis almost stripped bare.


The plan is to replace the outriggers on the chassis that the front of the body mounts on as they look somewhat home made and then repaint the complete chassis with something a bit better than last time as it has not faired so well. While I have the good access, the gearbox will be changed for one I had re-built a few years ago, which has a large tip mainshaft and better synchro rings. Then it's just a matter of re-assembly, easy eh?

Friday, July 15, 2011

Keeping the rust at bay

Having put so much effort into the replacement bodytub, I really wanted to make sure I was not going to have any bodywork issues for some time. Waxoyl is a commonly know make of cavity wax, but while looking around for the costs of it, I found things have moved on and there are other products, which perform much better. Based on cost, availability, and reviews, I went for Dynax S50 from Bilt Hamber. Along with a five litre can I ordered a injection lance, which is a length of tube with a diffuser on the end to make sure the 'wax' is thrown out 360degrees to coat all surfaces.
I didn't take any pictures while using the Dynax S50 as there isn't a lot to see really, but all the usual areas, such as around the wheel arches, in the sills and in the windscreen surround (especially over the top where GT6's like to rot out) were suitably coated.

With the inside and top side of the body all protected, there was just the underside to do, the job I was least looking forward to. As before, I wanted to coat the underside in something which would last, but all of the products I considered using required a clean and preferably bare metal surface. The headache I had here was that the underside had been coated with some form black Schultz underseal, which has a nasty habit of trapping water underneath it, but remains sticky, making it a pain to remove.


The process of stripping the underside took me quite a few evenings and weekends, it can be hard to motivate yourself to go and lie on a concrete floor to scrape off underseal and paint. The process I found most effective in the end was to scrape as much off by hand as possible, then use a bevel twisted knot wire brush on a angle grinder to get into the nooks and crannies to remove any last underseal. After that, it was a mix of strip & clean discs and flap discs to get the underside stripped.


After a bit more research, I had whittled it down to POR15 and Rust Bullet for the new underbody paint. I chose Rust Bullet this time as the overcoating did not need a primer, this paint is also UV resistant, unlike POR15, but I wanted to paint the underside in body colour anyway.
Rust Bullet needs two coats within four hours of each other, so the whole area I wanted to paint had to be accessible at once, this meant supporting the body from the extremities, not something I would recommend if you have any doubts about the strength of your body.


Screwfix sell single use paint brushes, which were just the job as I doubt it would have been worth using good quality brushes when there was little chance of cleaning them properly again. Eye protection and rubber gloves were also used, I did get a bit of paint on me and that took ages to remove, so I just hope it sticks to the car just as well.


24 hours after the second coat of Rust Bullet was applied I gave it a coat of green so it stands out less. The body has now been put aside while I prepare the car to remove the old body and carry out a few changes.